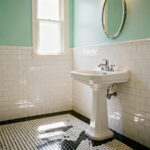
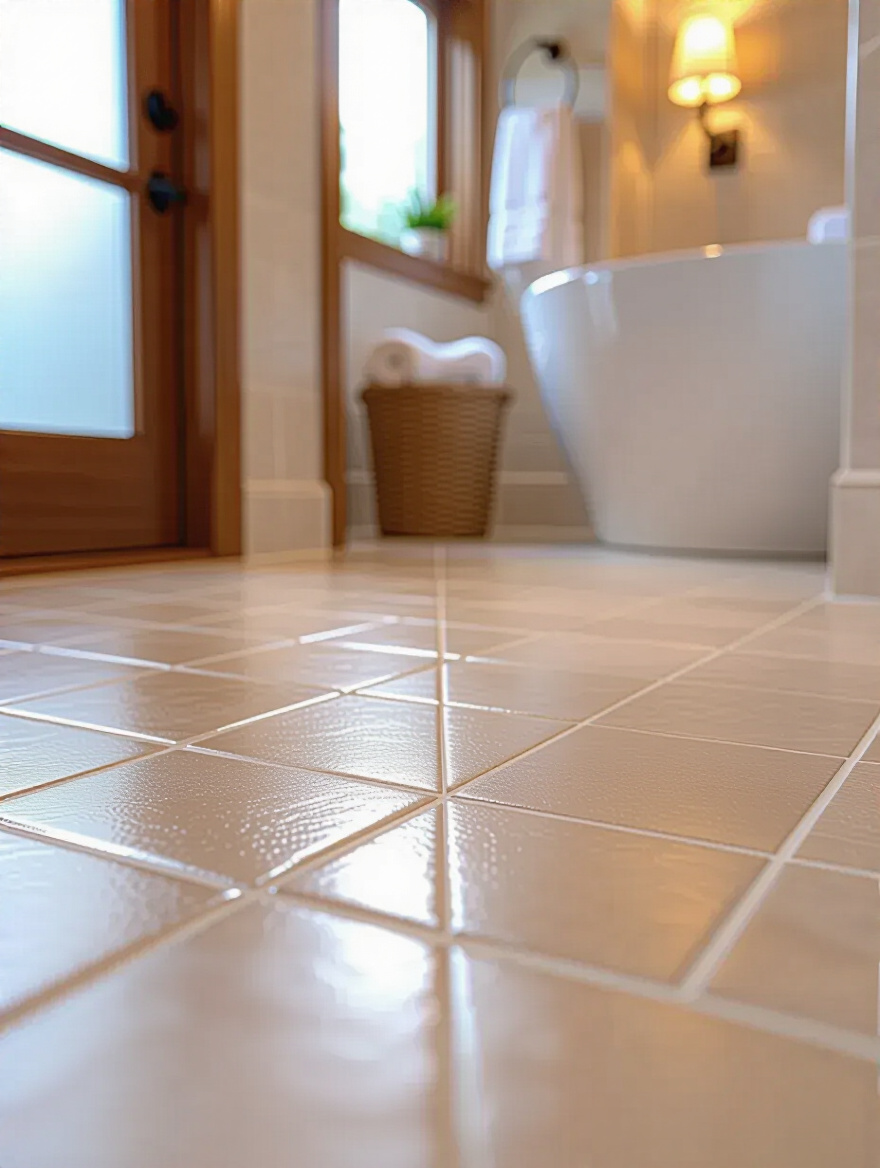
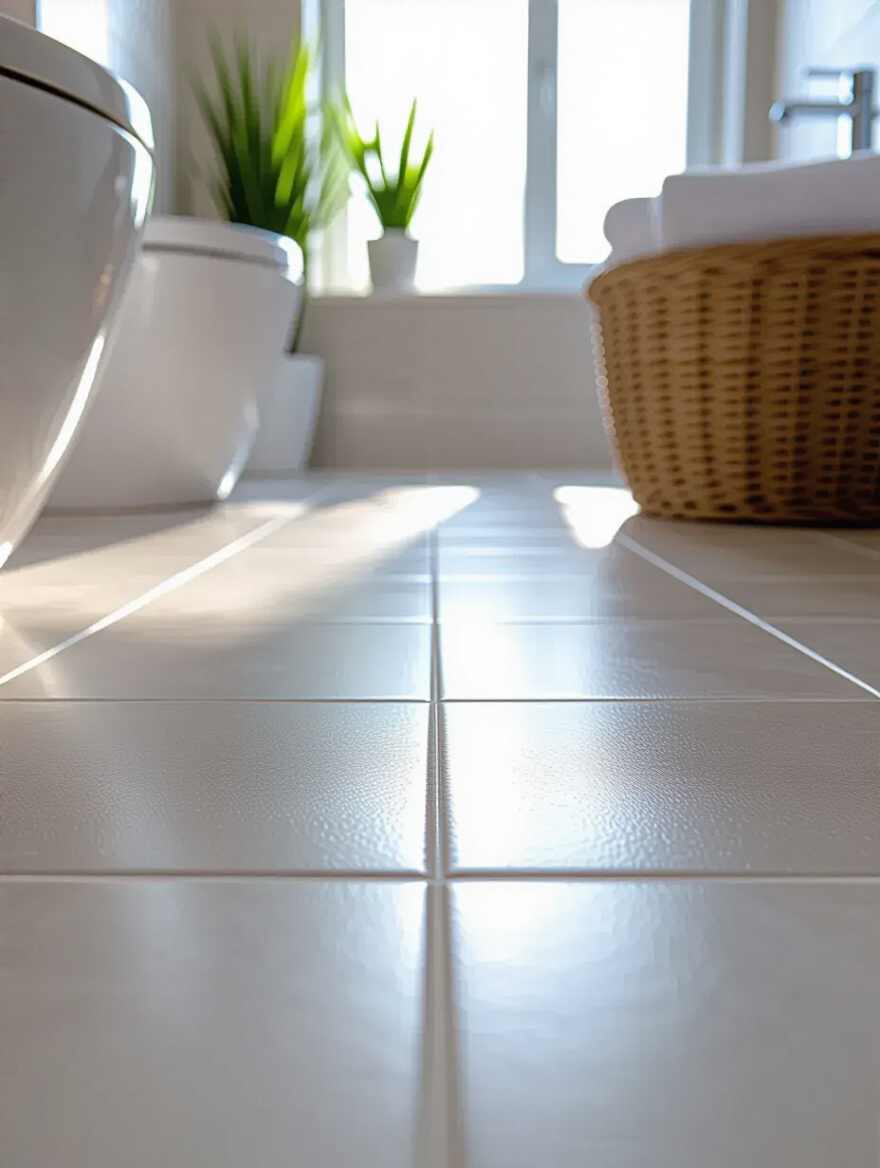
Picture this: It’s a chilly morning, and you step out of a warm shower. Your bare feet touch the floor. Is it an icy, cracked, unforgiving tile with grimy grout that makes you shudder? Or is it a solid, seamless, and maybe even gently warmed surface that feels like the start of a spa day, right in your own home? That feeling, that first point of contact, is the foundation of your entire bathroom experience. It’s not just about what a floor looks like; it’s about how it holds you.
So many people get this wrong. They see a pretty tile on a website, order it, and have a contractor slap it down on whatever mess is lurking underneath. But the secret to a bathroom floor that feels as good as it looks—and that will last for decades—is in the layers you can’t see. It’s in the planning, the prep, and the nitty-gritty details that most guides just gloss over. This is what actually matters, so let’s talk about it.
Meticulous Planning & Preparation: Laying the Groundwork for Success (Part 1)
This is the boring part that everyone wants to skip, but I’m telling you, it’s everything. Think of it like preparing a loom before you start weaving a masterpiece. If your foundation isn’t solid, straight, and strong, the whole pattern will fall apart. Rushing this stage is the fastest way to turn a dream bathroom into a money-pit nightmare.
1. Establish a Realistic Budget to Avoid Overspending Surprises
You absolutely have to start with the money, and you have to be brutally honest about it. A budget isn’t a suggestion; it’s your roadmap. It tells you where you can go and keeps you from getting lost. Without it, you’ll fall in love with Italian marble you can’t afford and end up with surprise bills that will curdle the joy of your new space. What really matters isn’t the total number, but building in a cushion for the unknown.
The biggest piece of BS people believe is that the quote they get is the final price. It never is. The real pro move is to add a 20% “What If” fund right on top of your estimate. That’s for when they pull up the old vinyl and find a soft spot in the subfloor, or discover some funky old plumbing. This single step is the difference between a stressful project and a smooth one. It’s the permission you give yourself to fix problems correctly instead of cutting corners.
With that safety net in place, you can move on to the next critical step: seeing what secrets your old floor is hiding.
2. Conduct a Thorough Subfloor Inspection for Structural Integrity
Before you even think about new tile, you have to rip off the old stuff and see what you’re really working with. The subfloor is the bones of your bathroom floor. If it’s weak, springy, or water-damaged, putting beautiful, expensive flooring on top is like putting a silk dress on a scarecrow. It’s a total waste, and it will fail. I once had a client who insisted her floor was “fine.” Three months after her gorgeous new tiles went in, hairline cracks started appearing in the grout. Why? The subfloor had too much flex. A simple inspection would have saved her thousands.
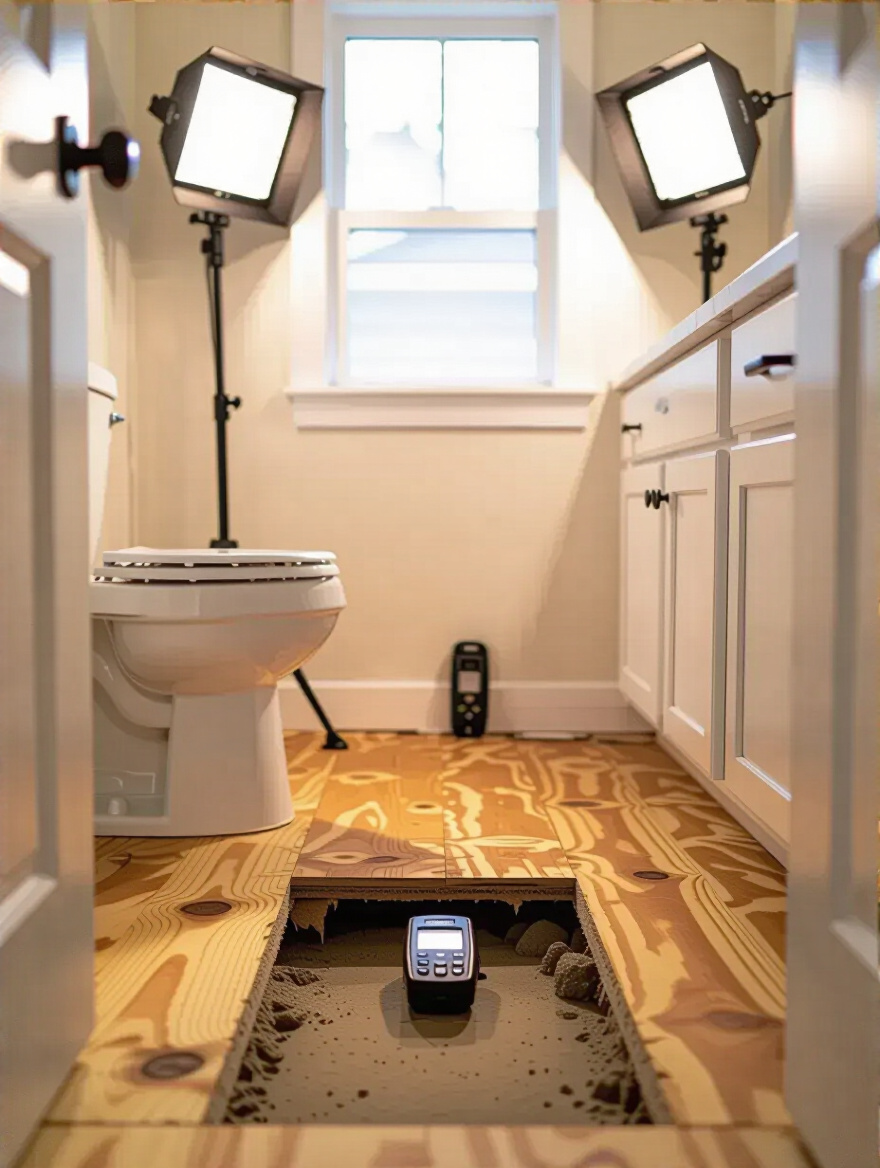
Walk every inch of it. Jump on it a little. Do you feel any give? See any dark stains, especially around the toilet or tub? Those are red flags for rot. Use a long, straight level to check for dips and humps. A floor needs to be incredibly flat and incredibly stiff, especially for tile. Don’t just patch a problem; find the leak that caused it and fix it right. This is the single most important moment for ensuring your floor feels solid—not just today, but ten years from now.
A solid base is everything, and now you can start layering on your vision.
3. Define Your Aesthetic Vision and Functional Requirements Clearly
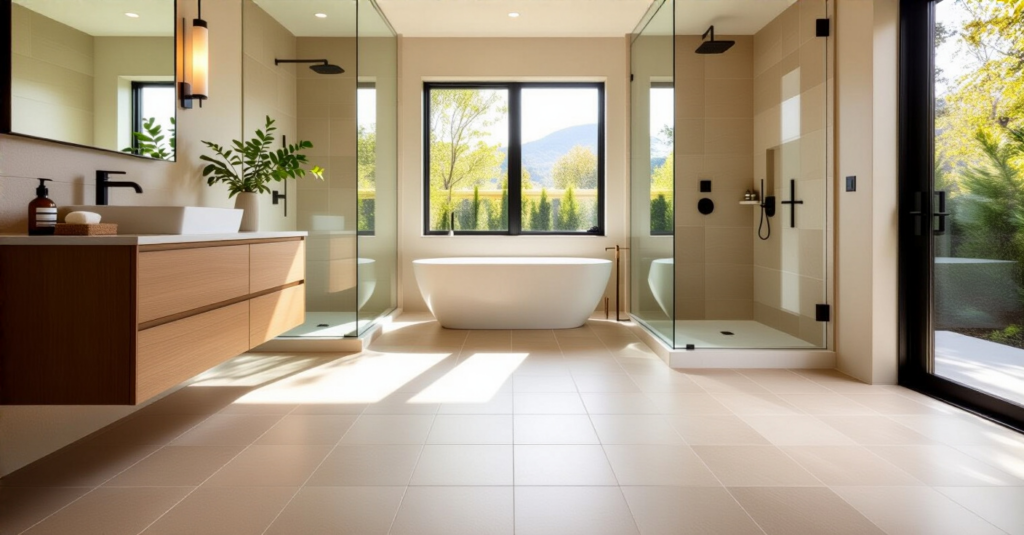
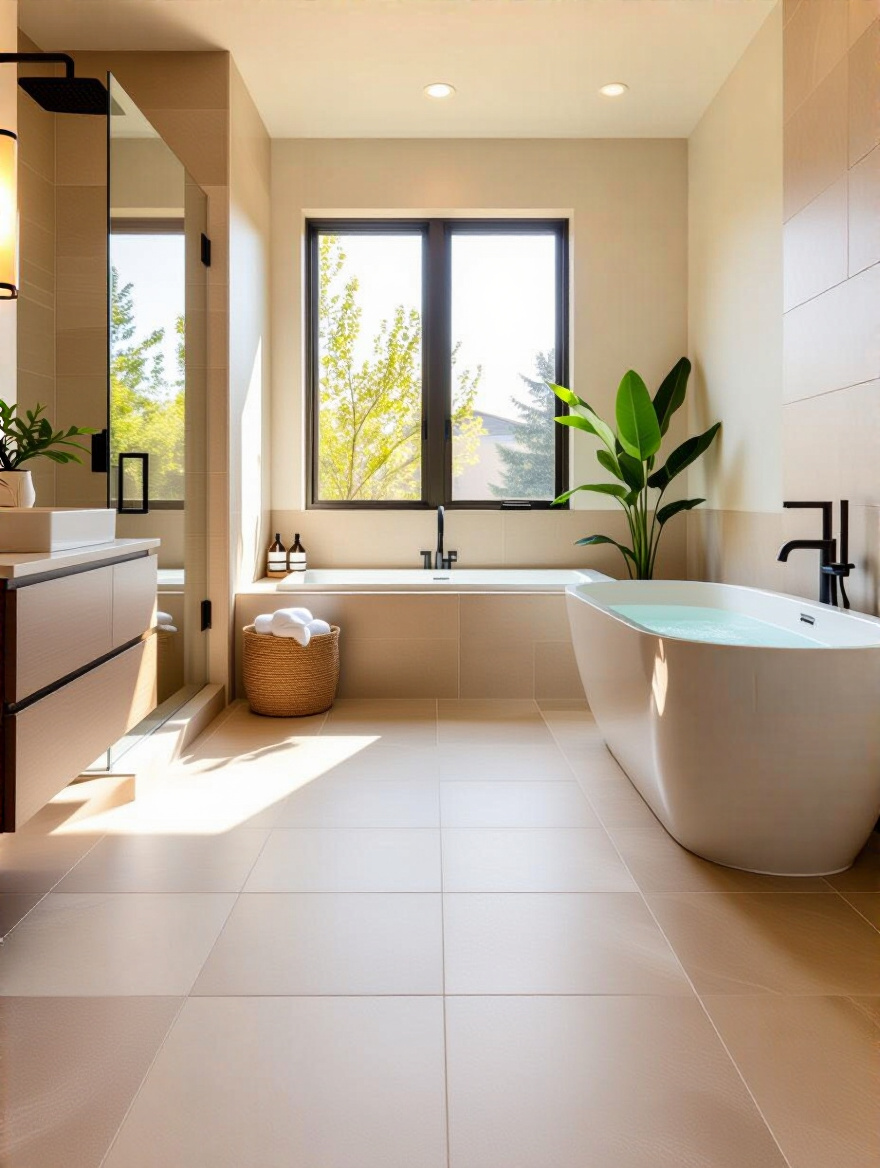
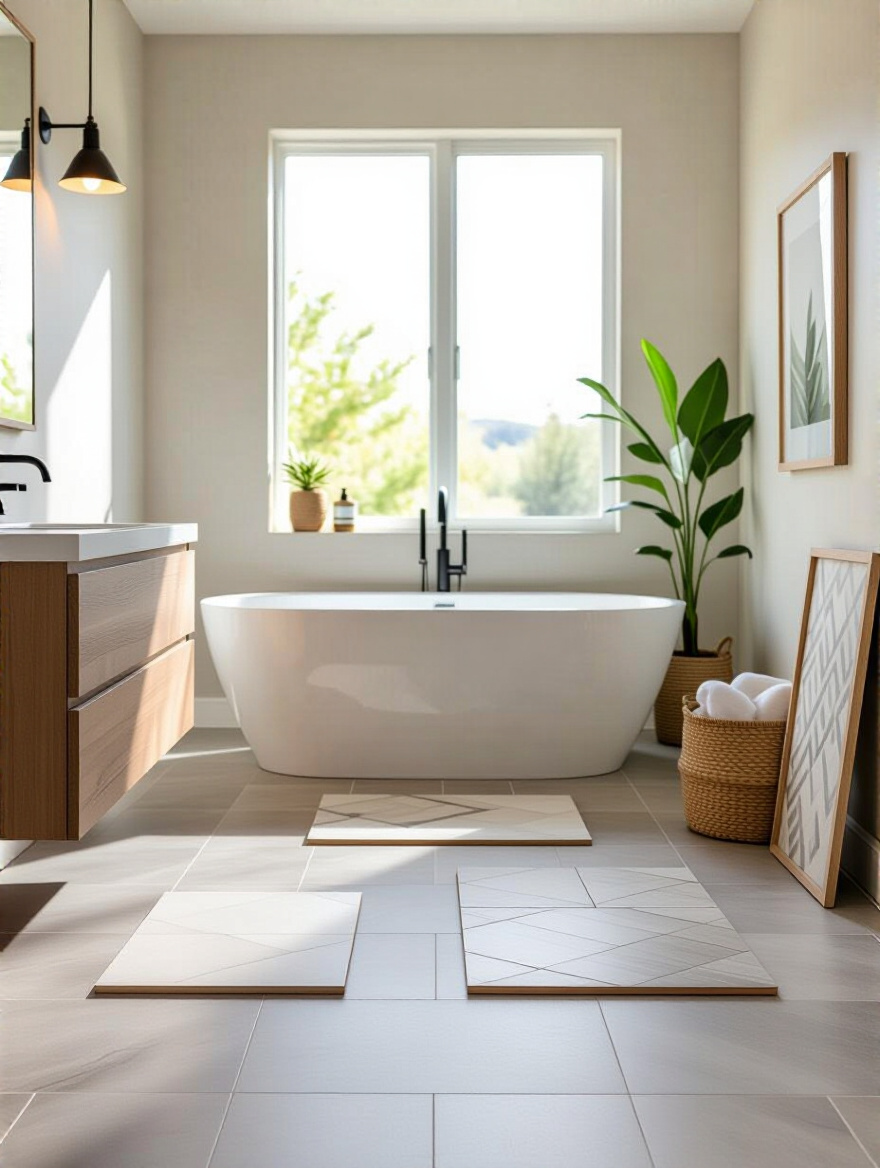
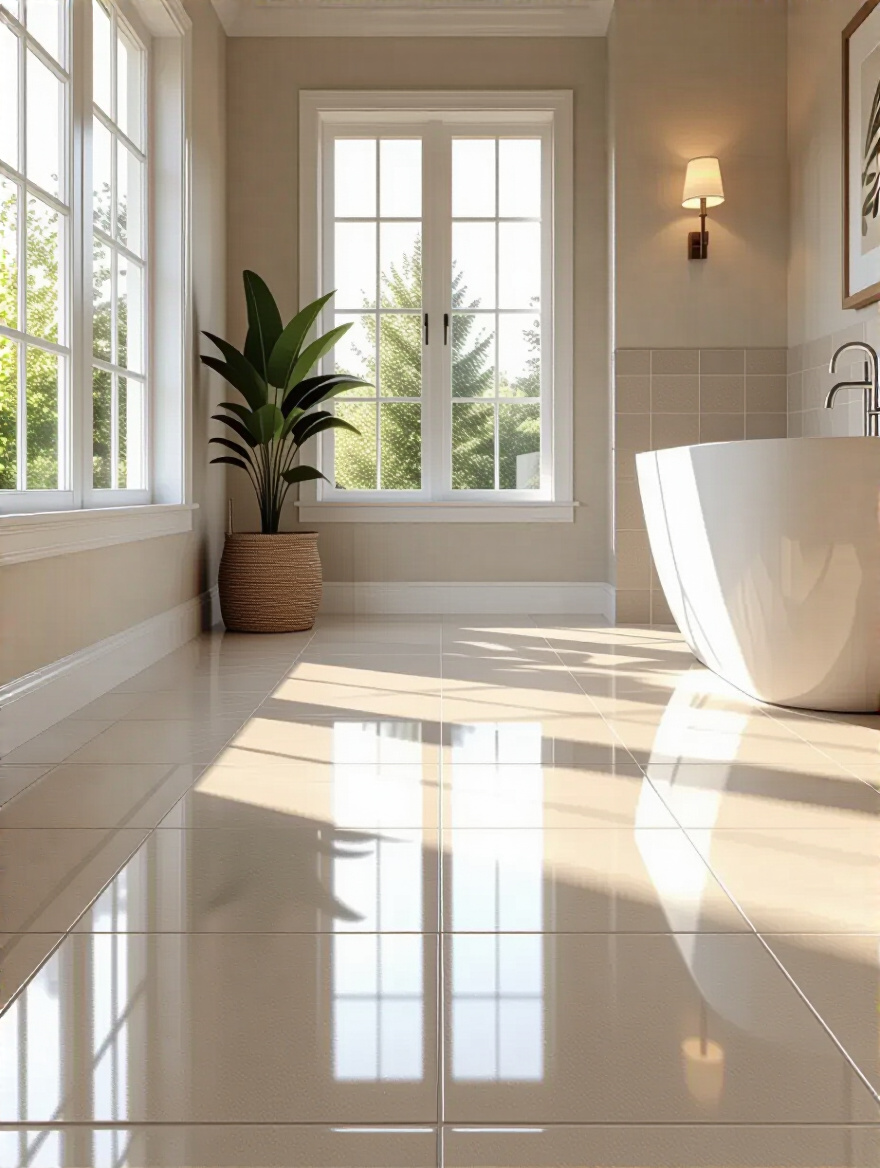
Okay, now for the fun part. But don’t just start grabbing things you like. You need a plan. Think of it like creating a fabric swatch board. Pull together images, colors, and textures that give you that cozy, calming feeling you’re after. Is it earthy and organic with stone and wood tones? Or is it crisp and clean with glossy surfaces and bright whites? A mood board on Pinterest is your best friend here. It’s not silly; it’s a vital tool that will keep you from buying things that look great in the store but feel totally wrong in your space.

Then, get practical. This isn’t just about looks. Who is using this bathroom? If you have little kids, a super-slick polished marble is a trip to the ER waiting to happen. You need something with texture, a good grip under wet feet. Do you hate cleaning? Then those tiny mosaic tiles with a million grout lines will be the bane of your existence. Be honest about your lifestyle. A bathroom floor has to work hard, so its function is just as important as its form. Balancing those two is the art of good design.
This vision will guide you directly to the perfect material for your foundation.
4. Research Material Durability and Water Resistance for Longevity
In a bathroom, water is the enemy. It will try to get everywhere. Your job is to choose a flooring material that acts like a fortress. Forget about real hardwood or standard laminate—they’ll swell and warp in a heartbeat. You’re looking for materials with a very low water absorption rate. This is where you have to be a bit of a nerd and look at the specs.
The gold standard is Porcelain tile, which is basically waterproof (it absorbs less than 0.5% water). That’s why you see it everywhere. It’s dense, hard-wearing, and comes in a million looks. The other champion is Luxury Vinyl Plank (LVP). This isn’t your grandma’s flimsy sheet vinyl. Modern LVP is thick, rigid, 100% waterproof, and feels warmer and softer underfoot than tile, which is a huge bonus for coziness. Don’t just trust the marketing term “water-resistant.” Look for “waterproof” and check that absorption spec. It’s the difference between a floor that lasts three years and one that lasts thirty.
Once you’ve got your materials short-listed, it’s time to gather your army of tools.
Meticulous Planning & Preparation: Laying the Groundwork for Success (Part 2)
We’re still in the prep phase, but now we’re getting hands-on. Having everything you need before you start is non-negotiable. There’s nothing worse than being halfway through a project, covered in mortar, and realizing you’re missing a critical tool. Every panicked trip to the hardware store costs you time, money, and sanity.
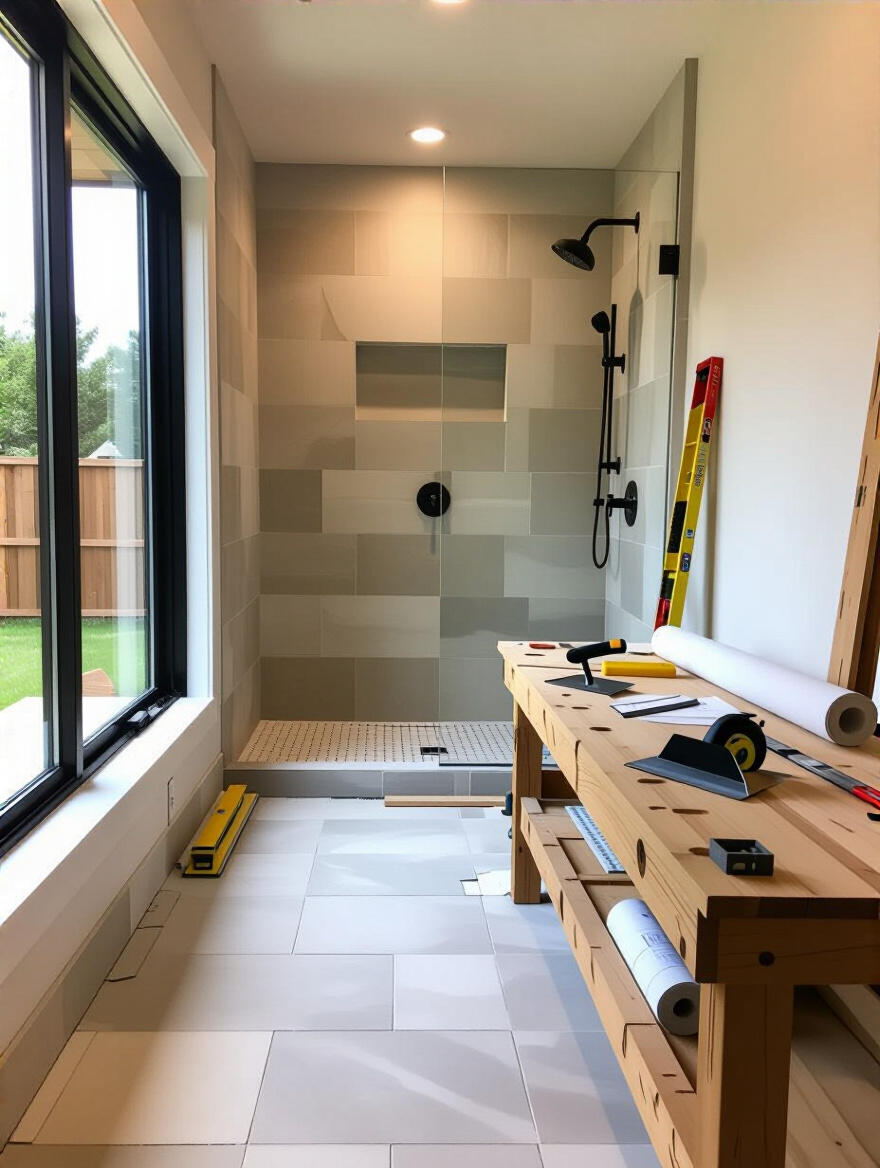
5. Gather Essential Tools and Safety Gear Before You Start
Seriously, lay everything out before you even pull up the first piece of old flooring. Make a list, check it twice. This means the big stuff, like a wet saw for cutting tile, and the small stuff, like the right-sized trowel and tile spacers. But just as important is your safety gear. Demolition kicks up a universe of dust you do not want in your lungs. Thin-set and grout can wreck your skin. And tile shards are razor-sharp.
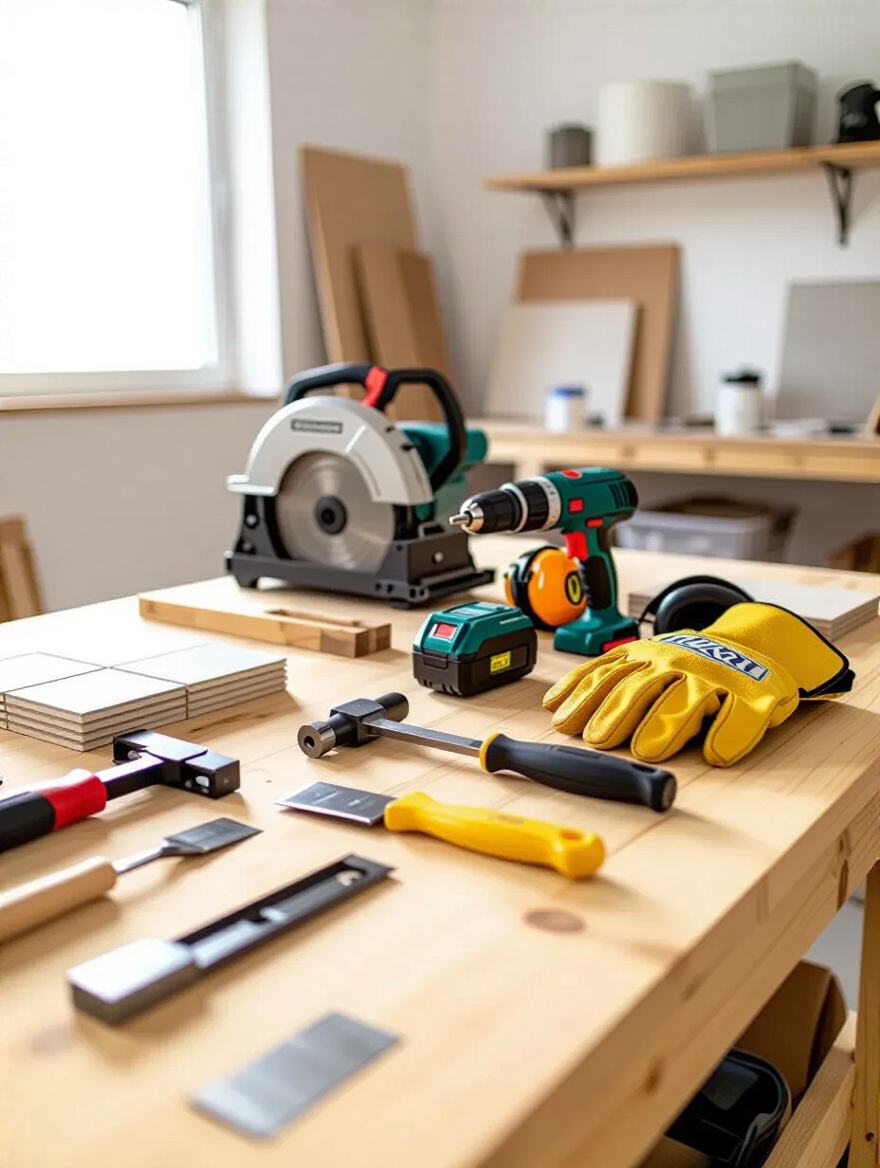
Get a good respirator (N95 at a minimum), proper safety glasses (not just your sunglasses), and thick gloves. Your knees will also thank you for a good pair of pads. People try to skimp on this, and it’s just foolish. I’m talking to you, guy who thinks he can just hold his breath. Don’t be that guy. Protecting your body is part of a professional process, even if you’re a DIY-er. This preparation is what allows you to work smoothly, safely, and without frustrating interruptions.
Now that your workspace is prepped and safe, we can finally dive into the materials.
Strategic Material Selection & Flawless Installation Techniques (Part 1)
This is where the magic really starts to happen. Choosing the right material and installing it with care is what will make your bathroom floor feel luxurious and lasting. We’re going to build it layer by layer, starting from the solid ground we already established and working our way up to a beautiful finish.
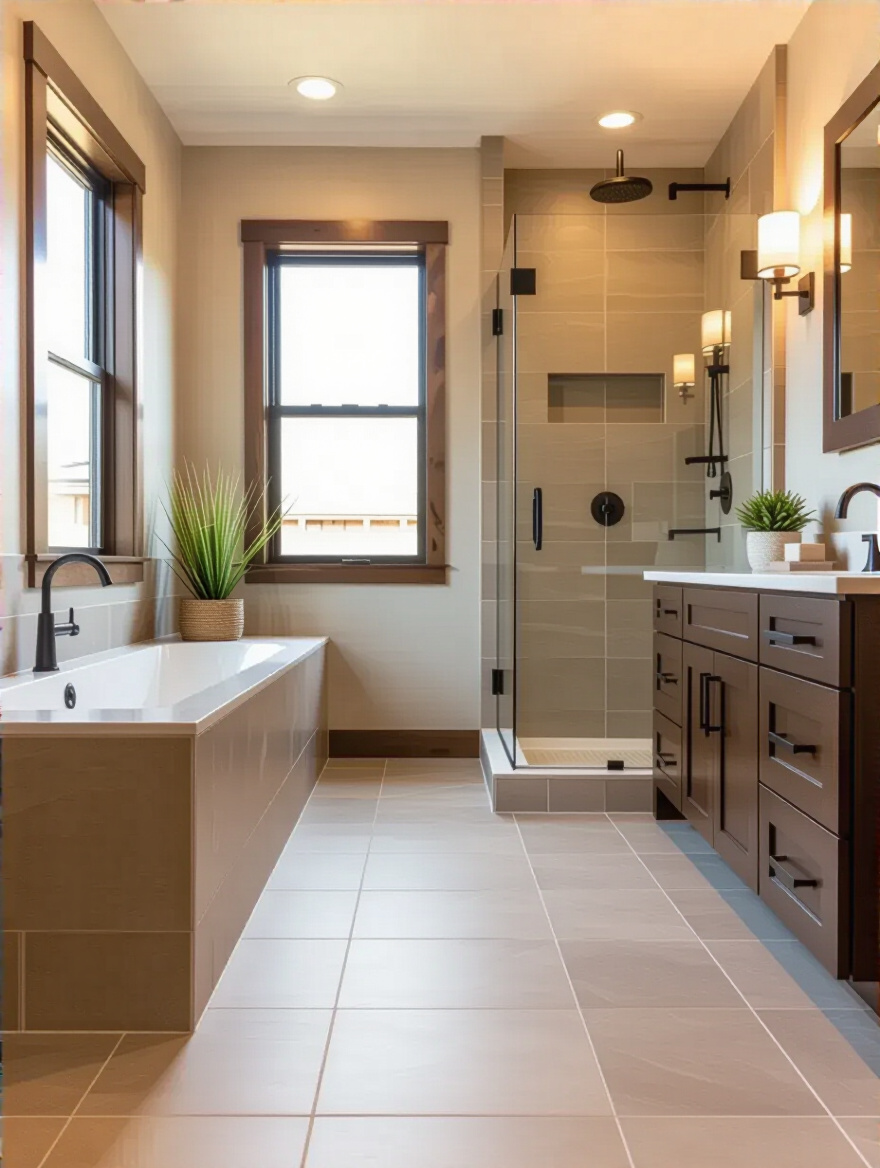
6. Select the Optimal Flooring Material for Bathroom Traffic and Moisture
We touched on this, but let’s go deeper. It’s not just about porcelain vs. vinyl. Think about the texture. A highly polished tile might look glamorous, but it’s dangerously slippery when wet. A matte or textured finish offers a much safer grip, which feels more secure and comforting underfoot. If you love the look of natural stone like marble or travertine, remember that they are porous and require regular sealing to prevent stains and water damage. They are higher maintenance, like a beautiful linen dress.
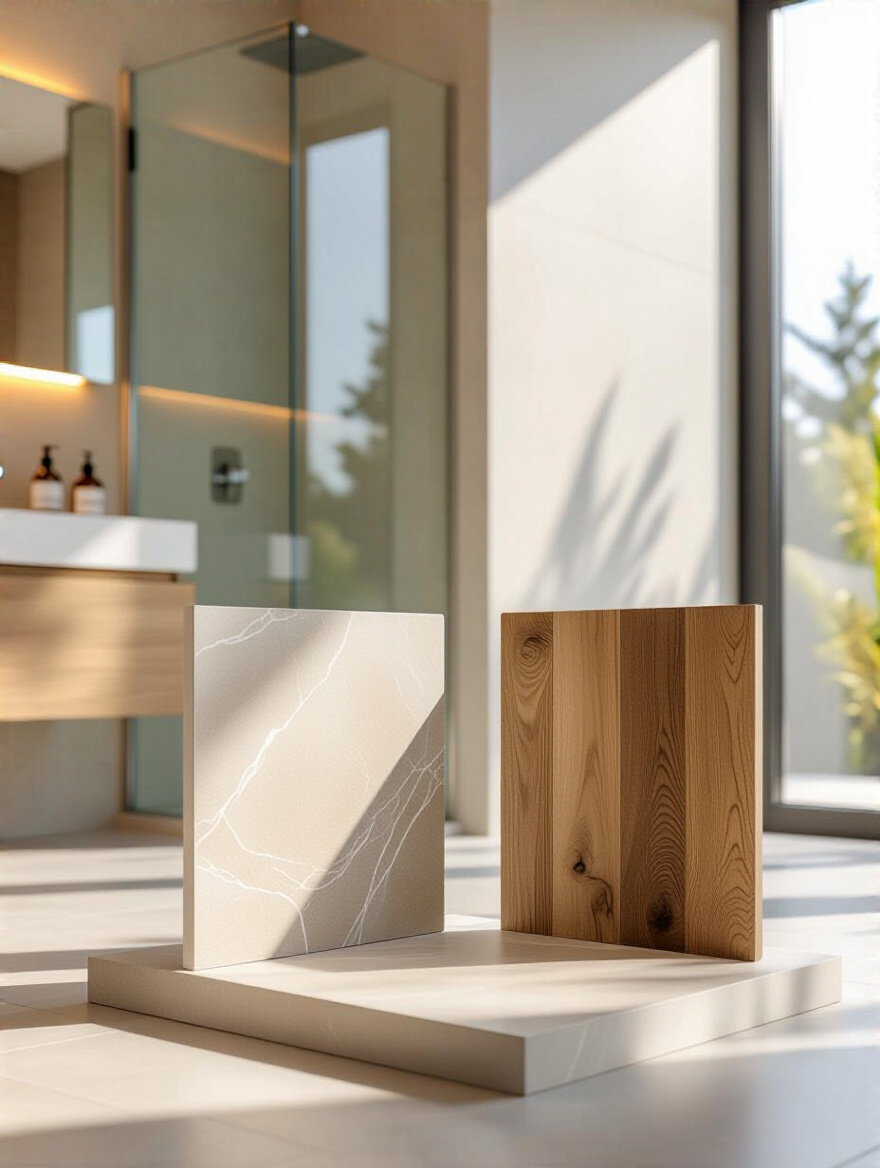
My secret tip? Get samples. Not just tiny 2×2 inch squares. Get at least one full-sized tile or plank of your top contenders. Lay them down in your bathroom. See how they look in the morning light, and at night under artificial light. Put them next to your vanity. Stand on them with bare feet. Do they feel cold and brittle, or solid and substantial? Living with the samples for a few days will tell you more than a thousand online pictures ever could.
Once you’ve found “the one,” it’s time to give it the perfect bed to lie in.
7. Prepare the Subfloor Precisely with Leveling Compounds or Backer Board
Your subfloor must be flat. Not “kind of flat.” Dead flat. Even a small dip or bump will cause a large-format tile to rock, creating a hollow spot underneath that will absolutely crack over time. This is where Self-Leveling Compound is a lifesaver. You mix it up, pour it out, and it magically fills in all the low spots, creating a perfect, glassy-smooth surface. It feels like a drastic step, but it’s what the pros do.

For tile, you almost always want to put down a layer of cement backer board first. This stuff is dimensionally stable and won’t swell or degrade with moisture like plywood can. It gives the tile a rigid, unbending surface to adhere to. The BS I hear all the time is, “Oh, you can just tile right over the old floor.” Don’t do it. You have no idea what condition that old floor is in, and you’re just adding a layer of potential failure. Start with a clean, flat, stable substrate. Every time.
Next, we add the most crucial layer of defense in the entire system.
8. Implement a Robust Waterproofing System for Lasting Protection
This is non-negotiable. Your tile and grout are not waterproof. Water can and will find its way through tiny cracks and porous grout. A waterproofing membrane, applied over your subfloor or backer board before you tile, is the only thing standing between a small splash and catastrophic rot in your floor joists. Think of it as a hidden rubber bathtub built right under your floor. It’s your ultimate insurance policy.
There are two main types: a liquid-applied membrane, which you paint on like thick, rubbery paint (the bright red or blue stuff you see on renovation shows), or a sheet membrane, which you lay down in large fabric-like sheets. Both work great. The key is to be meticulous. You have to cover every square inch, overlapping corners and seams perfectly. As one old-timer contractor told me, “Water is lazy, but it’s persistent. It will always find the one tiny hole you missed.” Taking the time to do this perfectly will give you total peace of mind.
With the fortress built, we can finally start making it beautiful.
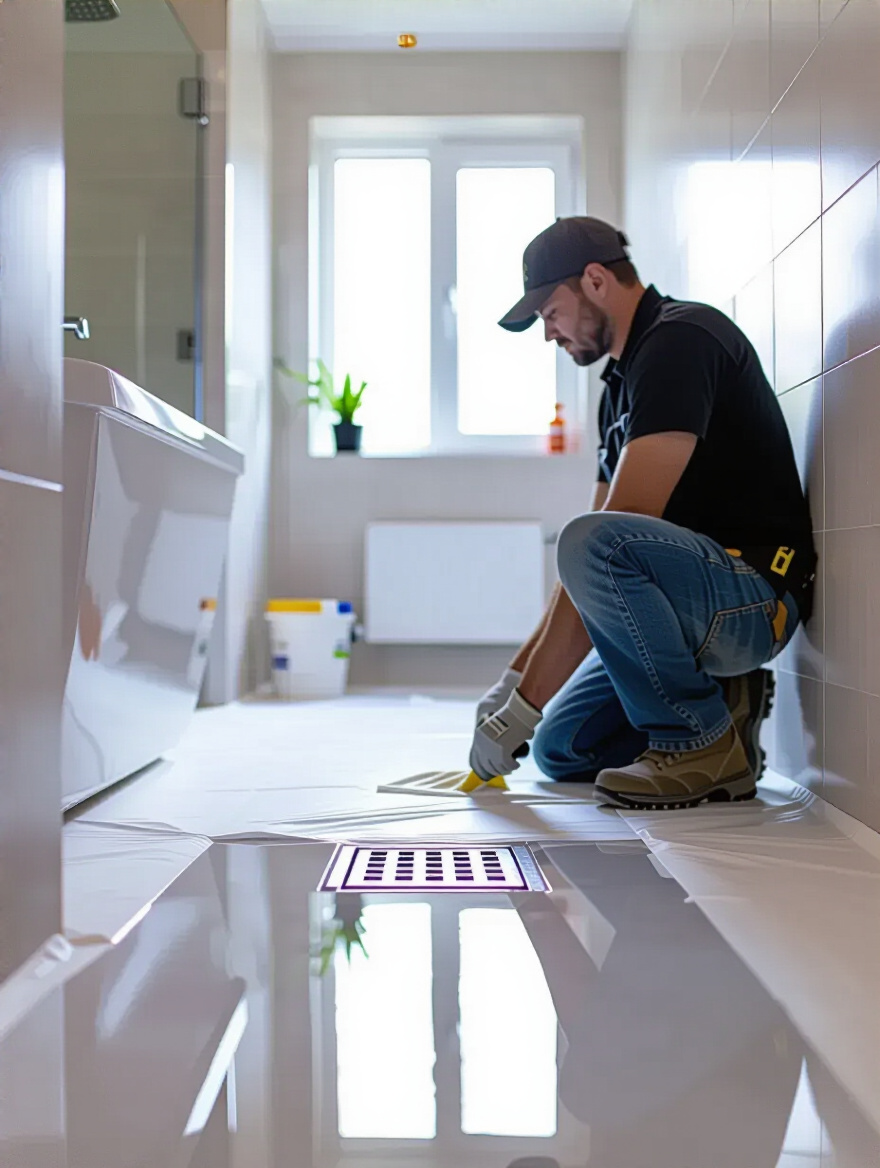
9. Master the Art of Laying Tile with Proper Spacing and Alignment
The difference between a DIY-looking job and a professional one is often the grout lines. They need to be perfectly straight and perfectly consistent. Your best friend for this is a laser level and tile spacers. Don’t try to eyeball it. You can’t. Start by dry-fitting your tiles—lay them out without any mortar—to figure out your pattern and where your cuts will land. You want to avoid ending up with tiny, awkward sliver-thin tiles along a prominent wall.
As you lay each tile, use spacers at every corner to maintain those perfect gaps. And use a tile leveling system. These are little plastic clips and wedges that you slip between the tiles. They lock adjacent tiles at the exact same height, completely eliminating “lippage”—that annoying thing where one tile edge is higher than its neighbor. This is especially crucial for large-format tiles. It’s a small extra step that makes a world of difference in the final finish. It makes the floor feel like a single, seamless surface.
Now, let’s make sure those beautiful tiles stay put forever.
Strategic Material Selection & Flawless Installation Techniques (Part 2)
We’re in the home stretch of the actual installation. These are the techniques that ensure your floor is not only beautiful but structurally sound. Don’t get sloppy now; these finishing details are what separate the amateurs from the artists.
10. Utilize the Correct Adhesive and Trowel Size for Strong Bonding
It’s not just “glue.” It’s thin-set mortar, and choosing the right kind is crucial. For porcelain tile or for laying tile over a waterproofing membrane, you need a good polymer-modified thin-set. But even more important is how you apply it. The little notches in your trowel are designed to leave a specific amount of mortar on the floor. A trowel with notches that are too small will starve the tile of adhesive, creating hollow spots. Too big, and you’ll have a huge mess with mortar oozing up through your grout lines.
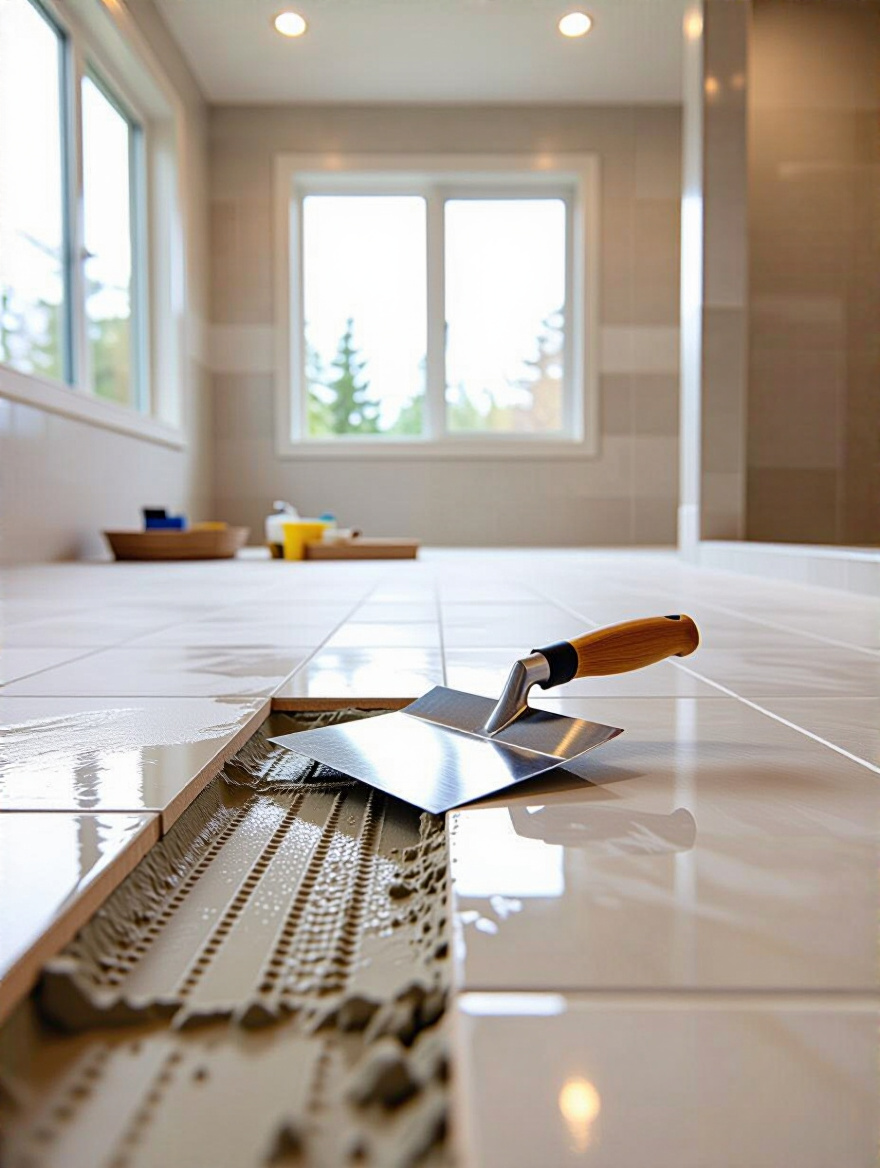
The bag of thin-set will tell you exactly which trowel size to use for your specific tile size. Listen to it. And here’s the pro shortcut everyone should know: back-buttering. This just means putting a thin, flat skim coat of mortar on the back of each tile before you press it into the mortar on the floor. It guarantees near 100% coverage, which is the key to an unbreakable bond and a floor that sounds and feels totally solid underfoot.
Once the tiles are set, it’s time to fill in the beautiful grid you’ve created.
11. Perfect Grout Application for a Seamless and Water-Resistant Finish
Grout is more than just filler; it’s a structural component that locks all your tiles together and provides your first line of defense against surface water. A sloppy grout job can ruin the look of the most expensive tile. Mix your grout to the consistency of peanut butter, and press it firmly into the joints with a grout float, swiping diagonally across the tiles. This ensures you’re packing the joints completely full, with no air pockets.
Here’s my big confession: I used to think all grout was the same. I was so wrong. For a bathroom, it is absolutely worth spending a little extra on a high-performance grout, like an epoxy or urethane-based one. Unlike traditional cement grout, these are stain-proof and don’t need sealing. They are a bit trickier to work with, but the payoff in durability and low maintenance is massive. No more scrubbing mildew out of your grout lines with a toothbrush. Ever.
And believe it or not, we need to leave some gaps intentionally empty.
12. Ensure Proper Expansion Gaps for Temperature Fluctuations
This might sound crazy, but your floor needs to breathe. As temperatures and humidity in your bathroom change, your tiles (and the structure of your house) will expand and contract ever so slightly. If your tile floor is jammed tight against the walls, the tub, and the vanity, that pressure has nowhere to go. It will build up until something gives—usually by popping a tile right off the floor, a phenomenon called “tenting.”
To prevent this, you must leave a small gap (about 1/4 inch) around the entire perimeter of the room. Don’t fill this gap with hard grout. That defeats the whole purpose. Instead, after grouting, you fill this perimeter joint with a flexible, 100% silicone caulk that color-matches your grout. The caulk will absorb all that movement, keeping your floor flat and stress-free for its entire life. It’s a small detail that saves you from a massive future headache.
The hard work is done. Now it’s time to put the jewelry on.
Elevated Finishing Touches & Long-Term Preservation (Part 1)
This is what I live for. The final touches are like adding the perfect pillows and throw to a sofa. They tie everything together and transform a functional space into a finished, intentional room. Don’t rush these details; they have a huge impact on the final cozy factor.
13. Choose the Right Transition Strips and Baseboards for a Polished Look
A beautiful floor that just stops dead at the doorway looks unfinished. You need a transition strip to create a graceful bridge between your new bathroom floor and the flooring in the hallway. Choose a material and finish that complements both surfaces. A simple metal strip is functional, but a wood or stone-look transition that matches one of the floors feels much more custom and high-end.
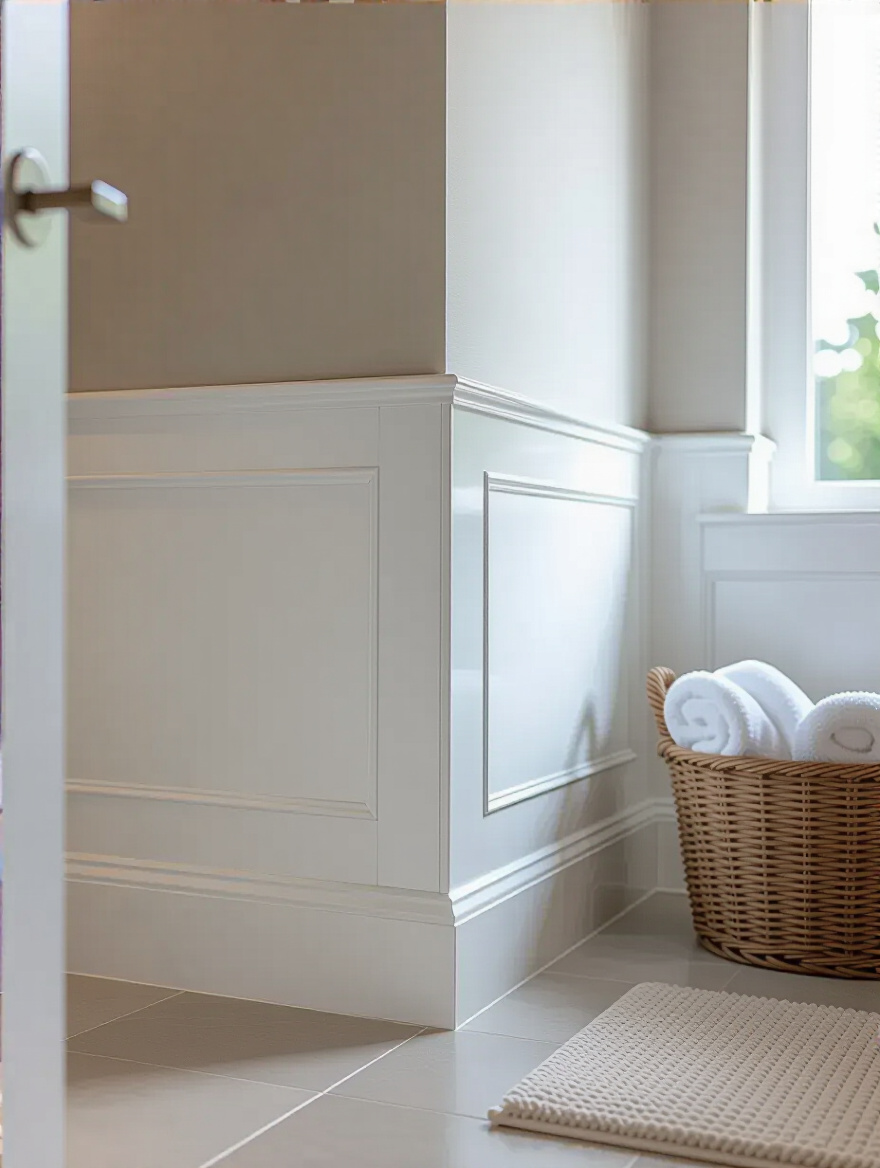
For baseboards, forget about standard MDF. It will act like a sponge in a humid bathroom and swell and crumble over time. Opt for waterproof PVC or solid wood baseboards that are properly primed and painted. This is another area where that little bit of extra investment pays huge dividends in longevity. A tall, crisp baseboard gives the room a sense of structure and elegance, neatly finishing the junction between floor and wall. It’s the frame for your masterpiece.
Now let’s add that invisible layer of armor to keep it looking perfect.
14. Apply a High-Quality Sealer to Protect Grout and Porous Tiles
If you used a traditional cement-based grout, it is porous like a sponge. Every drop of water, soap scum, or spilled makeup will soak right in, causing stains and discoloration. Sealing your grout is a non-negotiable step to protect it. A good penetrating sealer soaks into the grout and creates an invisible shield that repels water and stains. You should see water bead up on it like on a freshly waxed car.

The process is a bit tedious—you apply it carefully just to the grout lines with a small brush—but it’s so worth it. The same goes for any porous tile you chose, like natural stone. You have to seal the entire surface to protect it. I once had a client who installed beautiful unsealed travertine, and the first time her daughter spilled purple shampoo, it left a permanent stain. A five-minute sealing job would have prevented it entirely. Plan to re-seal every year or two to keep that protection strong.
How about we add a layer of pure, invisible luxury?
15. Integrate Radiant Floor Heating for Enhanced Comfort and Value
This is the ultimate secret weapon for creating a cozy bathroom. There is nothing—and I mean nothing—more luxurious than stepping onto a heated floor. It’s a completely different kind of warmth than forced air from a vent. It’s a gentle, consistent, radiant heat that warms you from your toes up and even helps to dry out the room after a shower. It turns a functional space into a personal sanctuary.
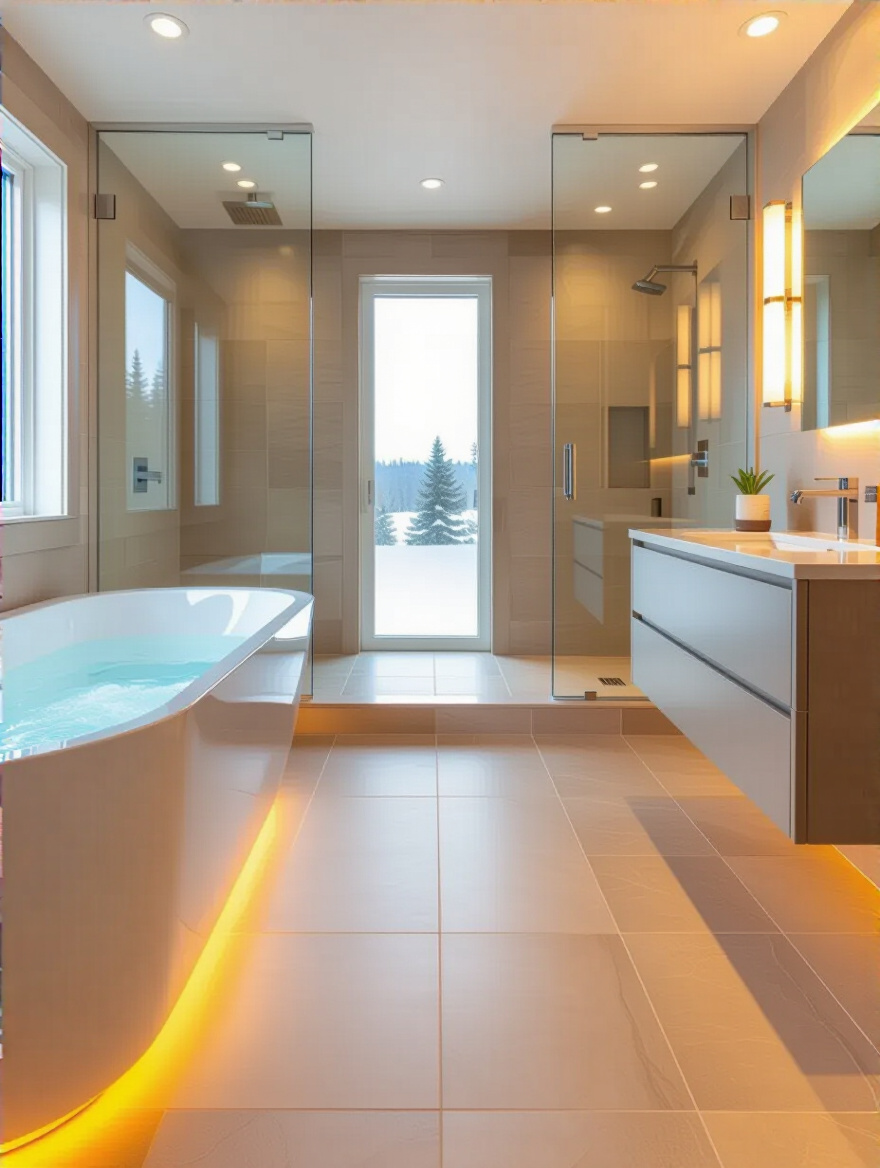
Electric radiant heating systems come in mats that you simply roll out and embed in the thin-set mortar right under your tiles. While it’s an extra upfront cost and requires an electrician, it’s one of the few upgrades that delivers a “wow” factor every single day. It’s also a huge selling feature if you ever move. If you are going through the trouble of redoing your floor, this is the time to add it. You will never, ever regret it.
Let’s make sure everyone can see the beautiful work you’ve done.
16. Optimize Lighting to Highlight Your New Floor’s Features
The wrong lighting can make the most beautiful floor look flat and boring. A single, harsh overhead light casts shadows and washes out color and texture. The trick is to use layers of light. Yes, just like we layer textiles, we layer light. Recessed ceiling lights can provide good overall illumination, but adding another layer is key.
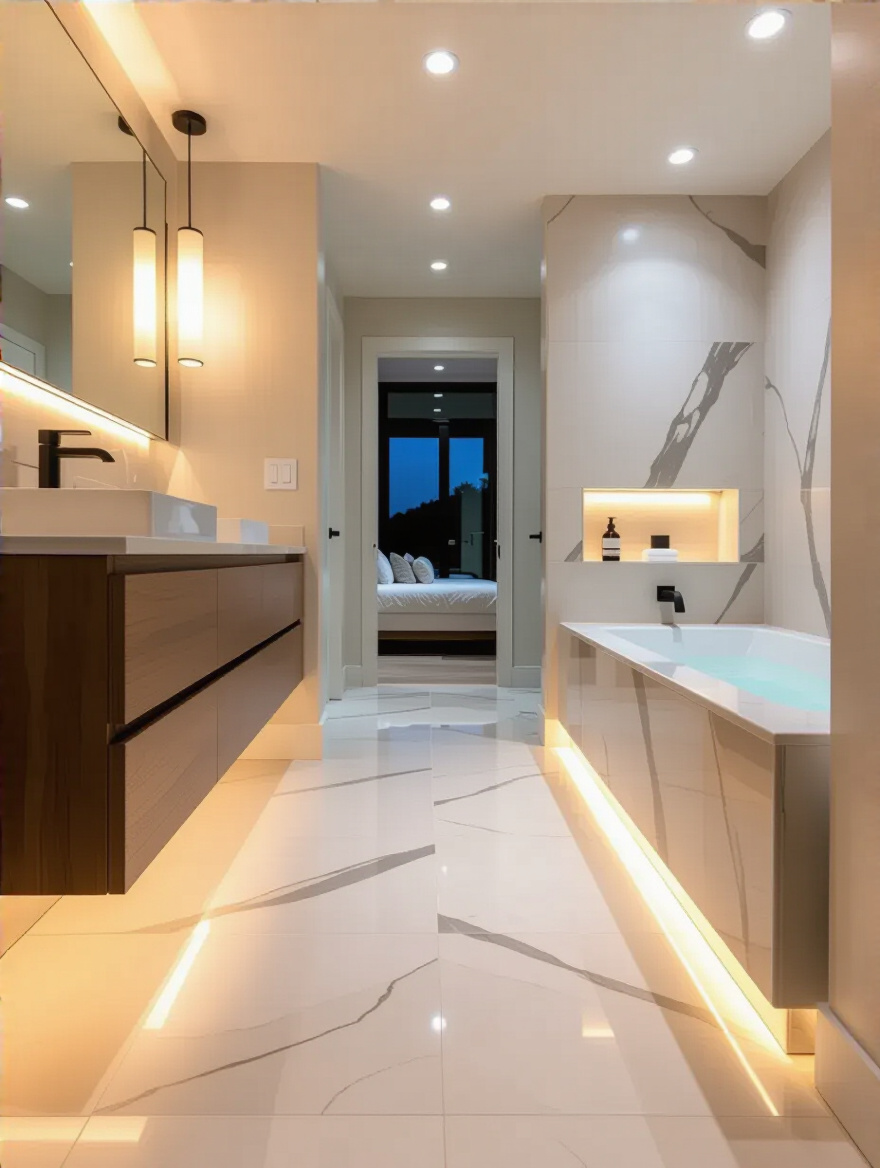
Consider adding low-level lighting, like LED strip lights under the toe-kick of your vanity. It creates a soft, beautiful glow across the floor that highlights its texture and makes the vanity appear to float. It’s also the perfect nightlight. Putting all your lights on dimmer switches is a game-changer, allowing you to go from bright and functional for cleaning to low and ambient for a relaxing bath. The right light is what makes your materials truly sing.
You’ve built your dream floor. Now, how do you keep it that way?
Elevated Finishing Touches & Long-Term Preservation (Part 2)
Your project isn’t truly finished until you have a plan to care for it. A beautiful floor is an investment, and like any good investment, it needs a little bit of ongoing attention to maintain its value and beauty. Don’t let your hard work go to waste through neglect.
17. Develop a Consistent Cleaning Routine to Maintain Floor Pristine Appearance
You just spent all this time and money creating a perfect surface; don’t ruin it with the wrong cleaner. Harsh, acidic cleaners like vinegar or bleach can eat away at grout and damage the finish on natural stone. All you need is a pH-neutral cleaner designed for your specific flooring material. Consistency is more important than intensity. A quick daily sweep or dust mop and a weekly wash are all it takes.
The big shortcut here is to squeegee the floor around your shower or tub after you use it. It takes ten seconds, but it prevents water spots and keeps moisture from sitting in your grout lines, which is the number one cause of mildew. Think of it less as a chore and more as daily care for a material you love. A gentle routine preserves the finish and the sealant, meaning less deep scrubbing for you in the long run.
And sometimes, that routine involves knowing your limits.
18. Know When to DIY and When to Call a Professional for Complex Tasks
It is so tempting to want to do everything yourself, I get it. But you have to be honest about your skills. You can probably handle demolition, painting, and maybe even laying tile in a simple square pattern. But things like leveling a badly sloped subfloor, waterproofing a shower, or any electrical or plumbing work are usually best left to a pro.
The mistake people make is thinking that hiring a professional is an all-or-nothing decision. The smart move is a hybrid approach. You do the parts you’re confident with to save money, and you hire out the high-stakes tasks where a mistake could cause a catastrophic failure. A professional tiler can lay a floor in a day that might take you a full week. Sometimes, paying for that speed and guaranteed quality is the best money you’ll spend on the whole project.
Finally, one last task before you officially pop the champagne.
19. Document the Process and Materials for Future Reference or Sale
This is my secret trick that almost no one does. Create a small “floor bible” for your bathroom. In it, keep a spare tile, the label from the grout bag with the color code, the name of the sealer you used, and photos you took during the renovation (especially of the waterproofing layer!). This is invaluable. Five years from now when you drop something and chip a tile, you’ll know exactly what to buy to replace it.
When you eventually sell your home, handing this binder to a potential buyer is an incredibly powerful move. It shows them that the work was done thoughtfully and professionally. It removes any fear of the unknown and demonstrates a level of care and quality that speaks volumes. It’s the final, professional touch that validates all the hard work you put into the project, preserving its story and its value for years to come.
Conclusion
So there you have it. Remodeling your bathroom floor isn’t just about picking a pretty tile. It’s an act of weaving together layers—a solid subfloor, impenetrable waterproofing, perfectly aligned tiles, and flexible seals—to create a foundation that is as durable as it is beautiful. By focusing on these details, you move beyond just redecorating and into the realm of true craftsmanship. You’re building a space that will bring you comfort, joy, and peace of mind every single day.
Imagine that feeling again: stepping onto a floor that is solid, clean, and warm beneath your feet. That isn’t a far-off dream. It’s the direct result of the thoughtful planning and meticulous work we just walked through. You are now equipped with the knowledge not just to manage this project, but to master it. You know what actually matters and what’s just noise. So take that next step. Start your mood board, measure your space, and get some samples. The perfect, cozy bathroom you deserve is waiting for you to build it from the ground up.